Thursday, October 25, 2012

Building a Backyard Neighborhood

After finally finishing repairs to my brass EBT 2-8-2 valve gear, it was time to get back to work on the the little mining town of Robertsdale, Pennsylvania, southern terminus of the East Broad Top Railroad.  The project began with the idea of recreating "company square" with its four company buildings: the company store, railroad station, post office and coal company offices.  (You can read about them in my earlier blogs.) 


Around the center of "downtown" I built a number of company houses, for the families of those who worked in the company owned coal mines.  Further south plans call for a large coal mine and tipple; but to the north, just the rear of the company store, I had an empty space that cried out for something interesting to fill it.  The area in question was long and relatively narrow --  just about a foot long in HO scale!  What could I put in such a small space?

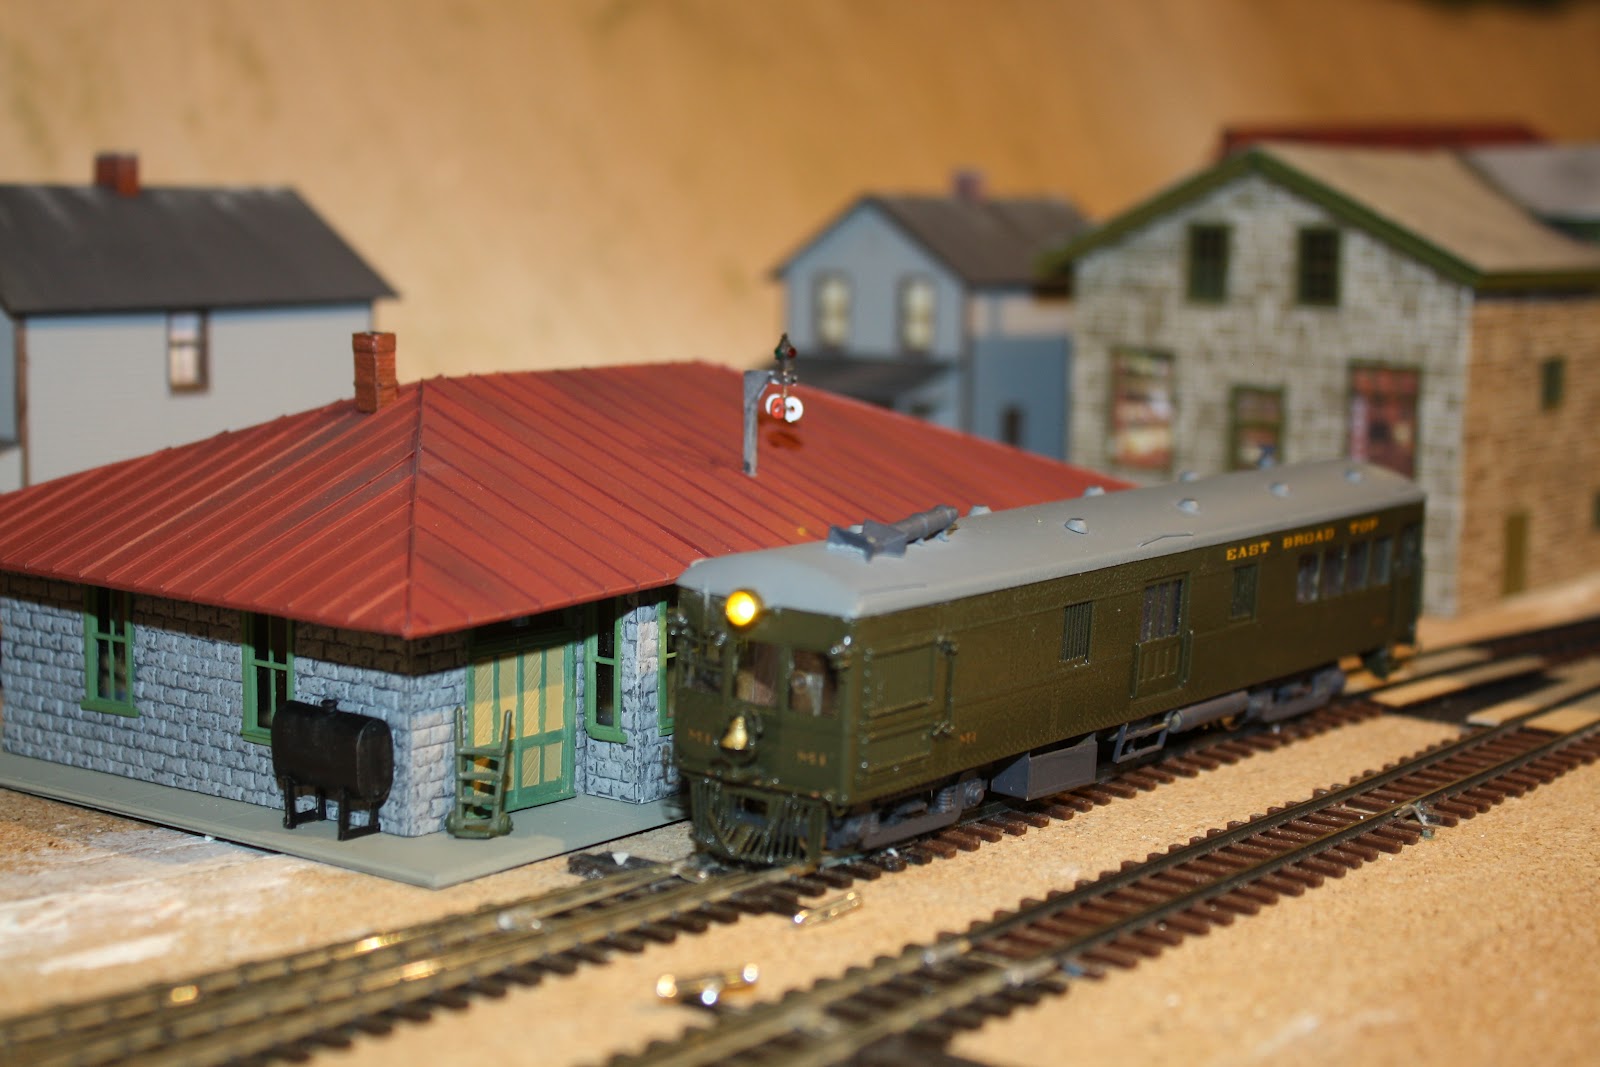
Robertsdale was, and is, a residential community.  The company store was for decades the only game in town for groceries, mining supplies, clothes, shoes -- you name it.  Aside from the station and the other two company owned structures, the rest of the town was mostly churches, schools of course, company houses, owned by the railroad and coal company right up into the 1950s.    There really wasn't a place for other lineside businesses or similar structures.

It was at this point that fate intervened in my musings.  I was flipping through some old copies of Railroad Model Craftsman when I ran across an article in the July 2010 issue that I had bookmarked for future reference.   In it, Gerry Leone described how he built a row of older homes backing up to the tracks out of City Classics company house kits.  Since he needed to fill a narrow space like mine, he decided to cut the styrene houses in two and make two buildings out of one.   The cut off ends of the houses faced away from the tracks, and were not modeled.  The resulting row of houses looked like this:


A little neighborhood, backing up on the tracks!  What a great idea!  And the wheels began to turn.  But I didn't want to use the City Classics kits for this application.  I already had four of them in the center of town, and while they were great houses for Robertsdale, I was looking for a different effect here.  Looking through my stash of parts left over from other building projects, I discovered that I had three or four kits of Model Power's Sullivan House.   It's a great model for kitbashing, and I had already used parts of two in the town of Blacklog.   The various versions of Sullivan's House all have a wing that attaches to the main part of the house.  The wing, it turns out, has window and door openings on all sides, even though one side is attached to the main structure.   In fact, one could easily convert the houses into two structures -- one standard rectangular house, and a smaller building that would be perfect for my little neighborhood.


After some digging around, I found parts for four of these little company houses.  In the drawing from the Sullivan's House kit (above) you can see the wing to the right that I planned to convert to a separate house.  The roof was replaced with styrene, and the shutters were eliminated as too frilly for such a basic dwelling.  The project was simplified when I discovered that the doors and windows were interchangeable in these kits, making it easy to move the back doors to the side facing the tracks.  I tried to give each of the four houses their own distinctive character -- two were left with lap siding, two were covered with paper Insulbrick shingles from Clever models.  Here is how they looked when I began.

 
 Four of these little homes would just fill the empty foot long space along the tracks.  The front of the houses face a tree covered hill, and are unseen.  The left end of this little community backs up to the rear of the company store.  To the right a railroad spur climbs steeply up to a logging site and sawmill.  The houses would be a fine way of separating the two scenes.
 
I cut a sheet of styrene to fit the area where the houses would go.  It was a lot easier to work on this project seated at my workbench.  As in Gerry Leone's RMC article, the houses would have distinct personalities, with various kinds of grass, gardens, fences, and especially people!  These houses would be lived in, and the various families would give their backyards a distinctive stamp.  Here is how the styrene base looked as it was laid out.   At this stage, I already had an idea of how the backyards would look.


With the lots laid out, I painted the areas where I would apply static grass, gravel walkways, vegetable gardens, or just plain dirt.
 
 
The next step was to apply dirt, gravel and , of course, static grass.  This was my first experience with using static electricity to apply grass fibers, and it worked surprisingly well.  I used an inexpensive device called a "Grasshopper" that I bought from Dave Leider (sooauthor@netzero.net), and it appeared to work as well as the much more expensive version from Noch.  I played with different types of grass, shorter and longer fibers, and blended grasses.  The initial results turned out even better than I had hoped.
 
 
 You can begin to see the distinctive character of each home from the details of their backyards.  The house on the left has a cement patio and walk.  A small garden plot with a trellis for pole beans (Noch) faces the tracks.  The next house's yard is neatly outlined with a typical white picket fence that came in a package of fencing from my local hobby store.  This house has a small addition which I cannibalized from one of my City Classics company houses.  Notice the light color gravel path along the side.  To the right is an unfenced yard with patch for tomatos and a small back porch.  A plank fence encloses the last house on the right, which I wanted to make into the neighborhood eyesore (every town has one).  Instead of a lawn, this dwelling's yard will be mostly dirt and weeds.
 
The next step is to fill in the people and the details that bring a community to life. The figures are from various sources, including Woodland Scenics.  The pole beans are from Noch.  The tomatos are from Creative Accents by Bill Lankford, which I found in the Scenic Express catalog, along with the tufts of buffalo grass weeds from MiniNatur.  Here is how the diorama looked when finished.
 
 
You can just see the red metal roof of the company store at the left end of the photo.  Following another cue from the RMC article, I named the families of this little trackside community alphabetically.  The first house on the left belongs to an elderly couple, the Andersons, who enjoy gardening and visits from their grandson, seen at the very left, working on his entry to the annual soap box derby.
 
 
To the right of the Andersons is the Benson family.  Mr. Benson is proud of his little company house, and can be found on any Saturday morning mowing the lawn.  I used a short grass fiber on the lawn to suggest a very manicured backyard.
 
 
On the other side of the Benson house live the Cappelletis, a young family with a daughter who loves to play with the family dog.  There were a great number of Italians who settled in Robertsdale to work in the mines, and many still live there today.  This morning, Mr. Cappelleti is working on his tomato plants, while his wife plans a spaghetti dinner with fresh tomato sauce. 
 
 
The last house on the right, at the very edge of town, belongs to the Dugans.  The Cappelittis are glad to have the tall board fence between them, as Micky Dugan not only likes his beer (even early on a Saturday morning) but does nothing to keep up his house and yard, which is filled with dirt and weeds, not to mention old tires, boards and other junk. 
 
 
So there you have it!  A little community on the outskirts of Robertsdale, full of character (and a few characters).  Have a spot on your layout you don't know what to do with?  Consider adding a small neighborhood to bring life to the railroad. After all, the folks who work in your industries and stores have to live somewhere, right?


Tuesday, September 25, 2012

Repairing the Running Gear on EBT No. 14

In my last post I explained how I managed to replace the broken valve gear on EBT No. 14.  The early EBT mikados (12, 14 and 15) used slide valves, while the later mikes (16, 17 and 18) were ordered from Baldwin with Southern, or piston style valve gear.  The slide valve gear is actually quite similar to the Walschaerts type gear, which is well documented. 

After having repaired the gear, using photo etched nickle silver replacement parts from Phil Light, I finished installing the Tsunami TSU-750 in the tender, with a 20 mm high bass speaker in the tank, as shown below.


As you can see, fitting in the decoder, speaker, capacitor and associated wiring required extensive modification of the tender shell.  All this cutting, nibbling, soldering, filing and fitting wires into the tender and locomotive, required a lot of handling.  After picking up the locomotive for the umpteenth time I noticed that another rod had popped loose.   What came loose were two connected rods or links, with a set of pincers on one end of the assembly, and a bracket on the other than slipped a pin holding the main rod in place.


Just to be safe, I checked the other side of the locomotive and found that while this assembly was still attached, the clamp that held it to the drive rod pin was loose and slipping.  So I was faced with repairing the damage on both sides of the engine!


Since I am not an expert in Walschaerts valve gear, I once again emailed my friend Phil Light, with an explanation of the problem and a photograph of the damage.  Phil replied that the small link that connected to the third driver was called the eccentric crank, and that it was connected by the longer eccentric rod to the expansion link.  Here is a diagram of the basic Walschaerts valve gear, which shows the eccentric crank and rod and its connections to the rest of the valve gear.


The names of the various rods and links are less important than how to reconnect them so that the engine works as it was designed.  Snapping the eccentric rod back on the expansion link was straightforward.  I simply had to use tweezers to tighten the pincers around the pin.  The real problem was reconnecting the eccentric crank to the crank pin on the third driver (see above).

With the piston fully inserted into the cylinder and the rods in a straight line as shown, the crank should be fixed to the pin at a specific angle (25 degrees), and soldered in place so that maintains its angular relationship to the wheel as it rotates.  This makes the eccentric rod move back and forth to rock the expansion link.

Once the eccentrics were arranged with the crank at the proper angle, the clamp was soldered to the crank pin using the same method as I did replacing the broken valve gear in the last post.  A small square of paper is perforated with a sharp pin (I enlarged the hole a bit with a toothpick) and slipped over the crank pin to prevent the solder from fixing the drive rod to the wheel.


With the paper in place, the eccentric link clamp is pressed over it.  Using a protractor, a 25 degree angle is measured and cut from paper, and used to set the correct angle for the eccentric link.


 I then carefully applied a small amount of TIX liquid flux to the top of the eccentric pin.


A hot soldering iron with a very small drop of solder is applied to the top of the pin, being careful not to hold it on the pin too long.


With the repairs made to the running gear, the engine was reassembled and run without incident.  Here No. 14 takes the siding at Rockhill while a coal drag chugs by on its way to Blacklog.  You can clearly see the eccentric link and rod successfully operating on the engineer's side. 


Wednesday, September 5, 2012

Repairing Broken Valve Gear on EBT No. 14

Back in July, I lost the use of my only operating steam engine, EBT mikado #14.   I should have seen it coming.  The slide valve gear on the fireman's side had been giving me fits for some time.  The various links and rods were connected with snap on pincers that fit around pins on the connecting parts.  One link in particular (I later learned it was called the radius rod) kept coming loose, and I had to watch it carefully to prevent a disaster.  The disaster came in the person of my 7-year-old grandson, who likes to run trains fast ... VERY fast!  In this case, #14 was roaring around the dual gauge wye at a significant fraction of the speed of light, when the rod came loose, dropped and dug into the ballast alongside, causing the locomotive to derail and the thin nickle silver rod to bend.

When I had a chance to sit down and work on the engine, I found that another rod (called the combination lever) had come loose from the valve slide crosshead.  This second lever was forked on one end to fit around the crosshead with a pin to hold it fast.   In trying to snap the lever back onto the crosshead, one side of the fork broke off.  While trying to remove the broken pieces, a small rod at the other end of the combination lever (called the union link, connecting with the driving rod crosshead) broke in two, leaving me with a royal mess!  Here you can see the broken parts.


The long vertical shaft is the combination lever.  You can see the broken fork head at the top (with the broken piece next to it).  The pin to which the radius rod connected is right below the broken part. At the other end of the lever is the broken union link.  Clearly this was a major disaster.  I could run the engine without the valve gear, but it would look rather odd.  This is a picture of the left (fireman's) side of the locomotive with the broken parts removed. 

Here is a view from the other (engineer's) side for comparison:


I was in a panic!  The Hallmark EBT mikados were produced back in the 1980's by Samhongsa, and had been out of production for decades.  There was no one to contact for spare parts.  With the encouragement of friends on HOn3 and HOn3 Chat lists on Yahoo! I decided to try to make repairs myself.  The first idea that came to mind was to cannibalize parts from another locomotive -- in this cast, a massive Pere Marquette steamer that had been sitting in my scrap box for years.  I dismantled the valve gear in hopes of finding something usable, but as you can see, the standard gauge parts were much larger than the tiny narrow gauge valve gear on #14.


Clearly, I was not going to be able to make repairs on my own.  In desperation, I put out a call for help on the internet and was overwhelmed when, within days, I had received replies from a number of fellow model railroaders offering to help.   One of those responding was Phil Light, owner of Light Scale Models, who has expertise in photo etching parts in nickle silver.  (You can check out his website at www.lightscalemodels.com -- he does exquisite work!)  Phil offered to make CAD drawings of the damaged links and arrange for them to be reproduced by a professional firm for a reasonable price.  After we exchanged emails, I felt comfortable contracting for the replacement parts.  Phil then send me PDF files of the CAD drawings.

Parts A and B are two options for the radius rod, one that includes a snap connction on one end, and the other which is designed for rivets at both ends.  C and D are options for the union link.  G1 and G2 are the two halves of the combination lever, which are designed to solder together to form one piece with a fork at the end, as in the following drawing:


 After we agreed on the work to be done, it was only a week or two before the etchings arrived in the mail.   The parts were on a sheet of nickle silver with four or more copies of each part, just in case.


Removing the replacement parts was (literally) a snap.  A few cuts with a hobby knife held against the part were enough to sever it from the sprue. 

I approached the repairs with trepidation.  I had never worked with such precision before.  The various rods and levers were connected with tiny 7 mm nickle silver rivets from Scale Hardware (www.scalehardware.com), a wonderful company that sells a wide range of tiny nuts, bolts, washers, rivets, and other hardware for the fine scale modeler.  The rivets are so small and delicate that Phil recommended soldering them in place, rather than crimping or tapping them closed.


With my heart in my throat, I laid out the tiny parts on the work bench.  The rivets are so small, that most of the work had to be done with magnifying glasses, just to see what I was doing!  Soldering the rivets turned out to be simpler than I had feared, thanks to an instruction sheet from Phil.  A paper bushing about 1/4 inch square is poked with a pin to make a hole large enough for the rivet to pass through.  The rivet passes through the first component, then the paper bushing and finally through the second component to be riveted. 


A small amount of flux is applied to the rivet tail where it contacts the component.  A tiny bead of solder is brought to the joint on the tip of a clean, hot iron, which neatly flows around the joint to secure the end of the rivet.  Amazingly, the paper bushing prevents any solder from seeping through the moving joint. 

I assembled the parts as a single subunit, consisting of the valve spindle crosshead, the combination lever, the radius rod, and the union link, all connected by 7 mm soldered rivets. 


The final step in the project was to install the valve gear assembly on the locomotive.  I carefully lifted the valve gear hanger and slipped the valve crosshead over the slide and inserted the piston rod in the cylinder.  The next step was to connect the radius rod (the long horizontal rod above) to the expansion link, which rocks up and down in operation.  The radius rod and expansion link are connected by a hex head pin that passes through both of them and holds them in the valve gear hanger assemble.  The pin is not threaded.  It is simple bent on the back side to hold everything in place. 


The union link (the short piece on the bottom of the combination lever, above) connected to a pin on the valve gear crosshead.  Unfortunately, In trying to snap the lever onto the pin, it broke off, forcing me to file the crosshead flat and bore a 7 mm hole through for a rivet to hold he union link in place.   Not wanting to disassemble the entire drive train to secure the rivet, I took a chance and decided to solder the rivet in close quarters between the crosshead and the drive rods.  To prevent solder accidently dripping on moving parts, I covered everything with blue masking tape, then carefully applied a small amount of flux to the end of the rivet.  Holding my breath along with the soldering iron, I gently inserted it between the back of the crosshead and the drivers, and applied a tiny drop of solder.  The rivet held, and the installation was complete.  All that remained was to put the engine on the layout and give it a test run.  Eureka!  No. 14 (minus boiler and cab) chugged back and forth, whistle sounding and bell clanging!  I won't say it is as good as new.  In fact, it is BETTER than new!  The rivets look a lot better than the old pegs, and the solder holds everything together more securely.  I was almost (I say, almost!) inspired to redo the valve gear on the engineer's side.  But there are enough other projects to keep me busy for a long time.  I'll put off a complete rebuild for another time.....

Monday, August 13, 2012

How I Spent My Summer Vacation

If you have been following this blog over the last year or so, you may have noticed a lack of activity in recent months.  To be frank, the blog has fallen into a black hole for the summer.   I had been happily chugging along, updating the progress in recreating the little mining town of Robertsdale at the southern end of the East Broad Top narrow gauge railroad.  Work came to a halt, however, when I was forced to deal with several unexpected crises that had nothing to do with the Robertsdale project.

The first crisis involved the dual gauge wye at the far end of the yard at Blacklog.  I did not build this wye.  I bought it on eBay a number of years ago.  Undoubtedly a piece of someone's former HOn3 layout, the wye was hand crafted with the rails and frogs secured to wooden ties with spikes.  I have tinkered with it continuously, trying to fix a host of problems with gauge, level, and just plain cranky mechanics.  The worst of the problems seemed to center on the wye switch and tail track, which caused my Hallmark EBT mikado to derail constantly.  Here you can see the wye in the foreground with Blacklog Refractories (BREFCO) in the distance.


A closeup of the wye reveals the complex trackwork.


Careful measurements with HOn3 track gauges revealed several spots right around the switch frog where the rails were too tight, causing the drivers to lift up and off the track.  That part was easily resolved by adjusting the rails, moving the spikes and bringing the track into gauge.  The other part of the problem involved the moving part of the switch: the point rails.   The points had small squares of sheet brass soldered to them.  Holes were bored in these brass squares, with small screws to secure the points to the throw bar.  The frog ends of the point rails were held in place by tiny spikes, which over time tended to loosen, allowing the rails to shift.  Result: More derailments.

I decided to take the bull by the horns, remove the point rails, and replace the throw bar with a PC tie to which the points would be soldered.  I secured the rails on either side of the new throw bar by soldering them to a pair of PC ties.  The brass squares at the tip of the points were unsoldered and reattached to the blunt end of the point rail, the frog end.  Track nails were driven through the brass squares into the plywood base, allowing the rails to pivot when the switch is thrown.  Here you can see how I did it.


At the top of the photo you can see the small brass squares attached to the point rails, with the track nails holding them in place, but allowing them to swivel when the switch is thrown.  There wasn't enough room to use the same technique on the standard gauge point rail, so it was secured to the frog rail with an insulating track joiner.  I sanded the wood ties down where the points pass over them to reduce drag.  Between the three PC ties are two wooden ties, primarily for appearances.  The new switch needs to be painted and ballasted, but mechanically, the mechanism works perfectly.  A locomotive can run through the switch over and over again without derailing.

The second crisis involved the only operating steam engine on the layout: EBT No. 14, equipped with a Tsunami decoder with sound and lights.  Ever since the engine became operational, I had noticed a problem with the valve gear.  No. 14 was purchased from Baldwin with slide valve gear, replaced on later engines with Southern piston valve gear.  On the model, the valve gear rods have small pincers or clamps at the end of the rod, which is designed to clamp over a rivet.  The radius rod, which runs from the rocker assembly to the valve spindle crosshead, attaches to the combination lever in this way. 

Unfortunately, the rod is made of very thin, stamped nickle silver, and had a tendency to slip off the pin to which it attaches.  This happened repeatedly, but the situation came to ahead when the rod detached while the engine was running at speed, dropped and dug into the ballast, bending the rod.  To make matters worse, the combination lever had broken off the valve crosshead, and while I was endeavoring to snap it back in place, the union link broke as well.  The union link connects to the other end of the combination lever, which attaches by a similar clamp and connects to the driving rod crosshead.

The upshot was that the valve gear on the fireman's side of the locomotive was broken beyond repair.  Here is a photo of the broken pieces.  The long piece on the left is the combination lever.  The pin just below the broken head is where the radius rod would have been attached.  The union link at the bottom connects to the driver crosshead.


At first I thought of trying to cannibalize components from the valve gear of one of my old scrap steam engines -- all HO gauge, unfortunately.  When I salvaged some similar parts. they were far too large to use as replacements.  It looked as if old No. 14 was headed for permanent stationary display.  That's when the light bulb went off in my head.  I belong to at least three different on-line groups, two focused on HOn3 in general and one specifically on the East Broad Top.  I put out an SOS on all three lists: Is there anyone who can help?

I have said it before on this blog, and I will say it again.  Model railroaders are a wonderful group of folks, most of whom will go out of their way to help a fellow modeler in trouble.  Within hours I received the first offer of help ... all the way from the United Kingdom!  Other offers followed.  One was from a modeler in Ohio who does photo etching.  He offered to make drawings of the parts and have replacement parts etched out of sheet nickle silver.   I would receive a sheet something like this:


I accepted this kind offer, and the parts are now in production -- they should be ready in a week or two.  Then, of course, I will have the challenge of assembling them with tiny rivets and putting everything back together.  But at least there is a light at the end of the tunnel.

With no operating steam engine on the layout, I decided to start a new project.  I have three of the EBT's heavy 2-8-2 mikados, unpainted and still in the original boxes.  They were waiting for the "right time" to install decoders and paint them.  While I wasn't ready to do that much work right now, I decided to pull one out an install a  simple non-sound decoder so I would have something to pull that long string of new Blackstone hopper cars!

Installation of the decoder  -- a Digitrax DZ125 designed to fit Z, N and HOn3 locomotives -- was relatively simple.  The tender had plenty of room in the tank for the small sized decoder.  I ran wires under the tender floor using shrink tubing to hold them tightly against the center sill. 

I drilled holes in the end beam, and ran the wires through them to the can motor:


Once everything was hooked up correctly, I placed EBT No. 18 -- an 82 ton behemoth -- on the layout, and tried running it around the layout.  At first, it ran quite smoothly, especially when one considers that it had been sitting in a box for years!  But then it hit the dual gauge wye (remember that?) and stopped dead.  The power district circuit breaker began flashing, and little zaps sparked under the engine cab.  A cursory check found that the engine's trailing truck wheels were touching the brass engine frame on tight curves, with disastrous effect!

Looking for a quick fix that would get No. 18 up and running, I turned it over and checked the trailing truck.  Suddenly I noticed something green on the inside of the engine frame.  I had seen that stuff before.  It was a trace of Liquid Tape -- liquid insulation.  Apparently, the former owner of #18 had struggled with the same problem.

A quick trip to Radio Shack and I had a bottle of black Liquid Tape.  I removed the trailing truck and using a toothpick, carefully applied three or four layers of insulation, allowing time for each layer to dry thoroughly.  Here is a view of the underside of the engine with the Liquid Tape.


I was careful to keep most of the liquid insulation on the inside of the frame, so that almost nothing is visible from the outside.  By using black insulation, any visible trace of the Liquid Tape will be invisible when I paint the locomotive black.


The liquid insulation did the trick!  Repeated circuits of the layout revealed no hesitation or shorting due to the trailing truck.  I was so delighted with the project that I have already begun installing an identical decoder in No. 17, which should soon be operational.  Here is a view of No. 18 hauling a long line of Blackstone EBT hopper cars from the mines south of Robertsdale.


So with two problems resolved and the third in process, maybe I can finally get back to work on some of my long-term projects, like finishing up the town of Robertsdale.  And while I'm working on that, I can enjoy the sight of a heavy mike hauling strings of hoppers full of coal down the mountain.  Is this a great hobby or what!

Friday, June 22, 2012

Installing a Sound Decoder in the M-1

The East Broad Top was hit hard by the Great Depression.  By 1926, the new highways were beginning to cut into the EBT's passenger traffic, down 20% from its 1920 peak.  The railroad began exploring the virtues of motorized passenger equipment.  In 1926, the EBT approached the J. G. Brill Company in Philadelphia about the possibility of a narrow gauge gas-electric rail motor car which would include seating for 50 passengers and a small baggage compartment.  After some design work, the new unit was constructed in the Orbisonia shops.  It was officially named the M-1, with a 250 h.p. engine, tanks and trucks from Brill, and electrical equipment furnished by Westinghouse.  The EBT built the car body with seats for 12 passengers, and rebuilt coach number 8 with roller bearing trucks to serve as a trailer for the remainder of the seating capacity. 


In the 1980's, Hallmark imported a brass model of the M-1 with a DC can motor.  Several years ago I acquired an unpainted version of the car, painted and lettered it according to the prototype, and installed an inexpensive digital decoder to see how it ran.  Pleased with the results, I recently purchased a SoundTraxx TSU-1000 Tsunami sound decoder that would add sound and lighting to the model.  Anyone who has ever ridden in the M-1 knows that the beast is noisy enough to drown out any conversation.  SoundTraxx does not offer a sound decoder for the M-1, but they suggested an early Alco prime mover as a reasonable facsimile.  I opted for an Alco 244 Tsunami, which has just the right chugging sputter.  This post is a step-by-step description of how I installed the decoder and got the model M-1 up and running on my layout.

My first step was to install the front and rear lights.  With the advice and encouragement of Master Model Railroader Laurie McLean in Australia, I opted to use tiny 0606 surface mounted LEDs for the lights.  I purchased several of these "SMD" devices, with leads already soldered to the printed circuit board .  The diodes are incredibly small, but give off a bright, steady light when voltage is applied.  One needs to be careful with the leads, which are a twisted pair of magnet wires, to avoid breaking them or accidently shorting them to the brass shell. 

The Hallmark model has a hole already drilled in the back of the headlight fixture.  To avoid shorting the SMD to the sides of the headlight, I cut a very small square of paper, made a hole in the center of it, and threaded the SMD leads through the paper.  The diode was fixed to the paper with a drop of ACC cement.  The hole in the back of the lamp was enlarged so that a length of shrink tubing could be inserted and glued to the back of the paper/diode with ACC.  The tubing was then glued to the roof of the M-1 (above the motor) with ACC.  The magnet wires were stripped where they emerge from the tubing by dipping each wire in a drop of hot solder.  Then the magnet wires were soldered to blue and white #36 stranded wire.  The white and blue wires go to the decoder blue and white leads.  A 1.2 K resistor was soldered to the blue, or common lead.  This is a photo of the headlight assembly. 


And this is a view of the front with the SMD installed.  You can see the small square of typing paper that holds the diode.


The rear light was a little trickier, since the housing is much smaller than the headlight, not much larger than the SMD.  I tried using a small piece of paper, but diode kept shorting against the metal housing.  Finally, I decided to force the SMD into a small diameter piece of shrink tubing so that the diode was completely surrounded by insulation.  The tubing was just small enough to force into the light housing.  A slightly smaller piece of tubing was cemented to the back of the assembly, so that both diode and leads were fully insulated from the shell.  The SMD was then tested with an LED tester to make sure it was still working after all that pushing and squeezing.  Fortunately, it was.


The rear light was harder to install because of two interior walls separating the rear vestibule from the passenger compartment, and the passenger area from the baggage section.  Fortunately, there were doors in both partitions, and the wires were threaded through the open door windows to the space which would hold the decoder.  The SMDs give off a bright white light.  In order to soften and diffuse the light, I mixed a small amount of Tamiya X24 clear yellow paint with some Canopy glue.  The glue dries clear, and mixed with the paint gives the diode a soft yellow light that seems appealing to me.  I also filled the headlight fixture with the glue/paint mix.  When dry it gives the illusion of a lens covering the light.  The rear SMD received a drop of the Tamiya glue as well.

With the headlight and backup light wired, I turned next to installing a 20 mm high bass speaker for sound.   At first, I tried to squeeze the speaker next to the decoder just behind the can motor, but there was simply not enough space.  The alternative was to install it in the rear passenger compartment, which would allow the sound to exit through the hole in the floor where the rear truck is mounted, as well as through the rear door window.  There was plenty of space for the speaker, but the access hole above the truck had to be enlarged in order to insert the speaker. The speaker was secured with Goo to the floor of the coach.  Wires were threaded through the forward door window into the baggage compartment, and connected to the sound decoder.


The final step was to install wipers on the front and rear trucks for all-wheel pickup.  While the M-1 ran well enough using the left front truck wheels and right rear truck wheels, any dirt or interruption on the track tends to cause a momentary loss of power, causing the sound and lights to reset.   All wheel pickup has eliminated almost all of these momentary interruptions.  Here is the rear truck showing the red and black power wires to the decoder.  One wire is drawn through the kingpost via a wire soldered to a brass washer.  The other wire connects to a small piece of PC board cemented to the truck with Walther's Goo.  A short length of .01 brass wire is soldered to the PC board, and serves as a wiper for the wheels on that side of the truck.


Wipers were also installed on the front truck, a someone trickier project, requiring the removal of the can motor in order to drop the truck from the frame.  The process for constructing the wipers and mount was essentially the same as for the rear truck.


With speaker, lights, and wipers installed, all that remained was to connect the respective wires to the Tsunami decoder, slide the decoder into the space behind the can motor, and reassemble the model.  Here is the bottom of the M-1 with all wires in place, ready to assemble.


Of course, the proof (as the saying goes) is in the pudding, and I held my breath before powering up the NCE Power Pro system.  To my delight, the 244 prime mover sputtered to life, the lights came on, and the M-1 chugged around the layout from the dual gauge Blacklog yard, past the EBT shops at Rockhill, finally coming to a stop at the EBT station in Robertsdale, where these pictures were taken.


This was my second sound decoder installation, and I am beginning to get the knack of it.  That's a good thing, as I still have three EBT 2-8-2 mikados (16, 17 and 18) to paint and install DCC.  And believe me, if an old coot like me can learn to do this, anyone can!  The results are a delight to both the eye and the ear.  Try it, you'll like it!