Wednesday, September 4, 2013

Modifying a Bachmann GE 44 Tonner for EBT Yard Service

While wandering through my local hobby store recently, I noticed a clean looking Bachmann HO gauge GE 44 Ton diesel in the showcase.  It was on sale for $20.  No matter that I model the East Broad Top, which was a narrow gauge steam railroad!  No matter that I operate DCC, and this engine was DC!  No matter that the logo on the side of the cab read Boston & Maine!  The price was right, and I sprang for it.

You see, the EBT was experimenting with diesel engines way back in the early 1950s, and had even been in conversation with GE about soliciting bids for a dieselization program.  According to an article by Lance Myers in the summer 2010 issue of the Timber Transfer, GE had proposed in 1953 producing four 80-ton 600 horsepower diesels plus one standard gauge unit of the same size, for $106,000 each.  In 1955, just before abandonment, the EBT contacted GE again.  At that time, GE offered a pair of 65 ton 550 hp diesels, plus one 35 ton switcher for Mount Union.  Nothing came of these discussions, and the railroad closed with only one piece of internal combustion equipment: the gas electric motor car M-1.

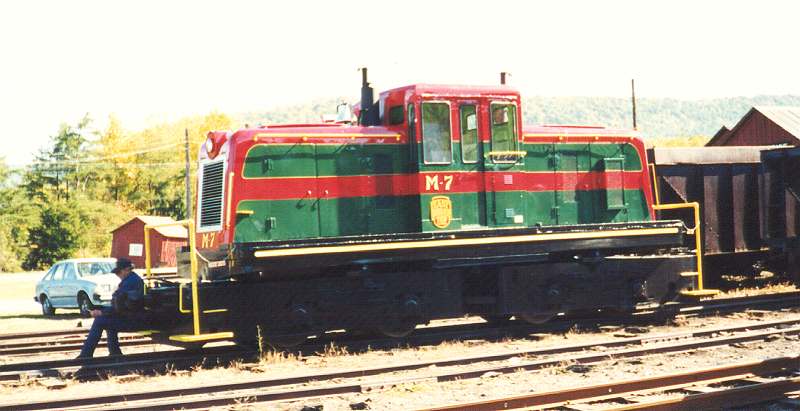
After the railroad reopened as a tourist attraction in 1960, management acquired a collection of 16 different gas or diesel locomotives.  Only eight of them were actually used in service; the rest were stored on the property and disposed of over the years.  Until the end of tourist operations two years ago, trains were hauled either by 2-8-2 #15 or by GE 55 ton diesel electric M-7.  Several smaller diesels are still in occasional use for shifting in the Rockhill yard.  Here is a photo of the M-7 in operation.


So maybe my idea of an EBT diesel wasn't such a wild idea after all!  Upon inspection, I found that the only glaring problem was the Boston & Maine logo on the center cab.  I brushed on a small puddle of Solvaset, let it sit for a minute, and then began to work the logo with a wooden toothpick.  To my surprise and delight, the logo began to soften and come off.  It was a decal!  Careful work with several applications of Solvaset and rubbing gently with a toothpick resulted in the complete removal of the logo.  I then applied an EBT "acorn" logo from a set of steel hopper car decals, applied a coat of Microsol to settle it onto the cab surface, then sprayed the entire unit with Dullcoat.  The result was an engine that bore a fair resemblance to the M-7.


The EBT generally numbered their diesels with the prefix "M", but I argued that this diesel was recently acquired used from the Boston & Maine, and the railroad opted to leave it as number 118 for the time being. 

The next issue was converting the locomotive from DC to DCC.  The Bachmann engine has a small printed circuit board on top of the motor frame.  This acts as a constant lighting control for the front and rear 12 volt bulbs.  The unit has all wheel pick-up, which is ideal for DCC, expecially with such a small engine.  I carefully detached the printed circuit board from the frame, and disconnected the wires running to it.  They were clipped to the PC board, rather than soldered, which made it easy to separate the wires for each truck (using an ohm meter to determine which wire went to which side), the wires to the motor, and the wires to the lights.  I carefully tagged each pair of wires with tape.


Rummaging through my box of decoders, I found a Soundtraxx MC1Z102SQ 2 function decoder that was no bigger than my thumbnail.  The Z in the model number is a dead giveaway.  You can see from the above photo that the tiny decoder fits right on top of the frame, leaving plenty of room for the shell to fit on top.  I connected the wheels to the red and black decoder wires, then the motor to the orange and gray leads.  A quick test on the layout showed no problem running forward and back.  I then ran the white wire to the headlight and the yellow wire to the backup light.  The blue decoder wire is the common for lighting, and was connected the the other side of the front and rear bulbs.  An engineer from my scrap box completed the effect.


So there you have it.  A $20 EBT standard gauge diesel shifter perfect for shunting cars around the Blacklog Refractories brickyard.


This was a fun project that took a couple of evenings and adds some interest to the dual gauge operations at Blacklog.


Sunday, September 1, 2013

Blacklog Refractories Corporation (BREFCO)

In my previous post, I described the thriving Mount Union industries manufacturing firebrick for the steel furnaces of Pittsburgh and Steelton, Pennsylvania.  On my HO scale layout, the bustling town of Blacklog is modeled after Mount Union, and like its larger cousin to the north, includes both a coal cleaning plant and a brickyard.  Mount Union was home to North American Refractories (NARCO) and General Refractories (GREFCO), as well as the Harbison-Walker plant on the west side of town.  Blacklog is the home of Blacklog Refractories Corporation, or BREFCO, which occupies a significant space on one end of the layout.  Here is a picture of the plant, with the dual gauge yards and coal cleaning plant in the background, and the town of Blacklog on the right.


As you can see, the plant includes a conveyor from nearby Blacklog Mountain, which carries ganister rock from the quarry to the crusher on the left.  Additional ganister is brought in by rail below the conveyor.  The crushed rock is then carried by another conveyor to the two story brick building with its brick smoke stack, where the rock is mixed with water and moulded into bricks for firing.  The six kilns on the right are served by dual tracks to bring in coal for firing the ovens.   To the right of the kilns are a series of wood and metal buildings designed to warehouse the finished bricks until they can be carried off by boxcars.  The curved track in the foreground is the mainline of the Blacklog Valley Railroad, a standard gauge pike that shares the dual gauge yards in the left background.  If you look carefully, you might noticed three identical houses just beyond the plant.  These are modeled after actual GREFCO company houses along the EBT tracks in Mount Union.  Below is another view of the company houses with the warehouses on the right and the mountains in the background.


As I mentioned in my previous posting, the ground cover in the brickyard industrial area is #180 Sandstone, sanded grout from Polyblend, available at your local hardware or building supply store.  I first read about Polyblend in Bob Brown's "Ramblings" in the January/February 2010 issue of the Narrow Gauge and Shortline Gazette.  I had been waiting for an opportunity to try out this new ground cover material, and the brickyard seemed the perfect choice.  Bob had tried mixing the grout with water and brushing it on, but I tried spreading the grout and spraying with a fine water mist.  The misting worked well enough, but tended to get everything else on the layout just as wet (I should have used a plastic drop cloth, but hindsight is 20/20, right?)  I then tried brushing on diluted matte medium and sprinkling grout over it.  This also worked, but tended to produce clumpier and darker areas on the terrain.  I also used matte medium on piles of grout at the end of the stub sidings to build up end of the track bumpers, which came out very well.


The kilns in the photo above are plaster castings that were painted and colored with grimy black weathering powders.  The rusted metal bands holding the bricks together were painted onto the kilns using a Prismacolor dark umber marker.  I ran across the idea of using Prismacolor markers from Michael Duggan, owner of Paw of a Bear Models in Virginia.  The markers did color the bands as I had hoped, but it was hard to keep a straight line freehand.  At first, I was sure I had ruined the model, but after weathering with powders, and viewed from a distance, the less than perfect lines vanished in the distance (see above).


Clearly, the production of bricks requires more than crushed stone and kilns.  The stone has to be combined with water into a slurry, formed into moulds with the required shapes, and dried before firing.  Between the crusher and the kilns I chose to place a "mould house", using the Easton Mill kit by RDA (Railway Design Associates) out of Monson, Massachusetts.  This was a traditional northeastern brick mill building, with a large brick smoke stack at one end, and a conveyor belt from the crusher at the other.  I used white water color and a wetting agent to flood the gaps between bricks on the mill walls, to resemble mortar.  Half of the RDA roof was missing from the kit, so I replaced the kit's roof and its cupola with Evergreen corrugated metal.  To disguise the seams between sections of the kit, steel wire was shaped into downspouts, while Evergreen channel was used for gutters.  The results, including the BREFCO logo on the smoke stack, were exactly what was needed.


Here is another view of the building in place on the layout.


There are still a number of details to be added to the BREFCO  brickyard, including ballasting of the tracks outside the yard, adding weeds and shrubs around the major structures, along with a company water tower (complete with BREFCO) and a "burial ground" for broken and castoff bricks.  All of this remains to be added before I can call the Blacklog brickyard finished.