When the kit arrived, I was delighted. The weathered brick walls came out better than I could have hoped. In fact, the level of realism was outstanding. Here are a couple of pictures of the finished product before delivery. Mike took the photos in his yard with real trees for background.


In painting the roundhouse Rebeiro used familiar techniques for achieving the level of realism you see in the pictures. He is developing a PDF file that describes how he painted the structure. The file will be included with the kit. The windows and doors are made from layers of thin laser cut material that assemble easily. Anyone familiar with peel and stick windows in craftsman kits will have no difficulty with them.
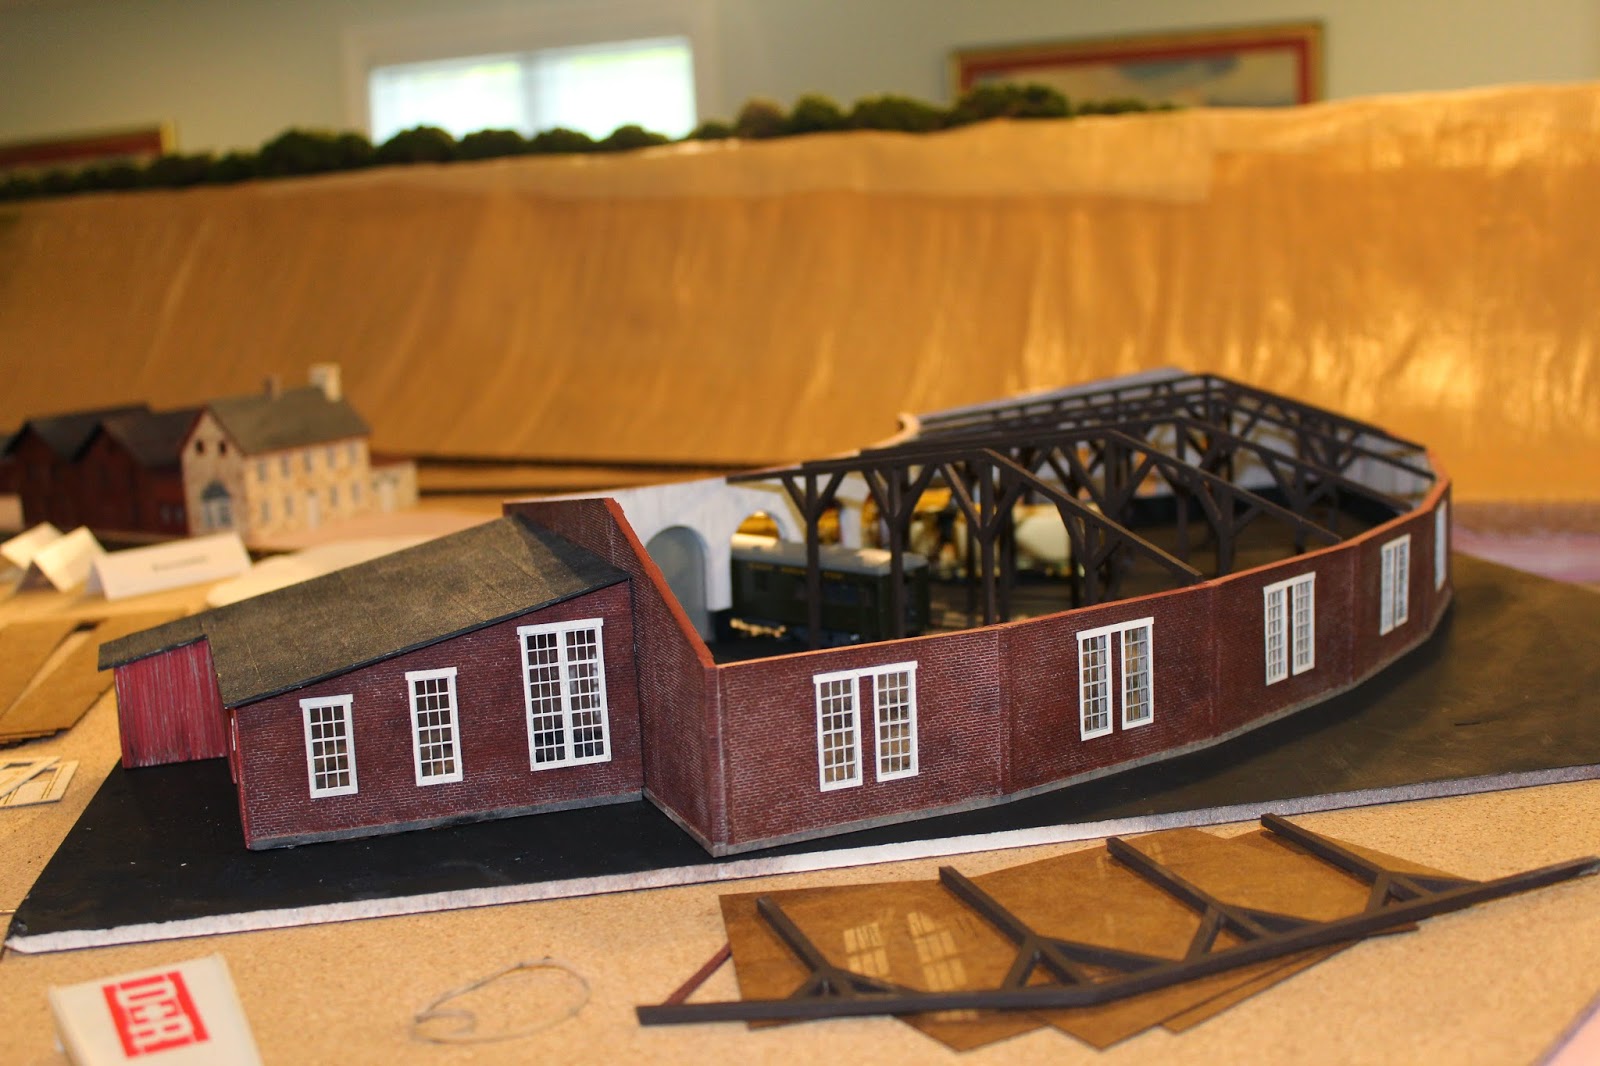
Mike delivered the roundhouse on a sheet of black foam core board. I gently carried it to the layout and tried placing it in various positions, to get a sense of how it would integrate with the Rockhill shops and yard. The white circle represents the 65 foot turntable that will sit in front of the structure.

My layout has a base of 2 inch extruded foam insulation resting on a grid of 1 x 4 pine. The Rockhill yard and shop complex sits on an additional layer of 1/8 inch cork. I wanted to be able to work on the roundhouse without having to stand on a stool under the pop-up behind it. The easiest solution was to mount roundhouse and turntable on a slab of foam insulation and cork, then cut a hole in the layout the same size as the module. When finished, I can then drop the roundhouse and turntable into the hole. With that in mind, I cut a 26 x 28 section of foam, and glued a layer of cork to it using Aileen's Tacky Spray. I deliberately made the cork wider than the foam so that it would cover the crack when the module was dropped into the yard. I then moved both foam and roundhouse to a separate work area.

You will note that the garage on the right side of the roundhouse (visible in the previous picture) is not included on the foam base. It seemed simpler to have just the roundhouse and turntable on the moveable section. Once the module is dropped into the layout, the garage unit can be easily moved up against the roundhouse. This keeps the movable section as compact as possible.
With the roundhouse in place, I used the floor templates (visible inside the structure) to draw converging lines to determine the center of the turntable. I then used a compass to draw the 65 foot turntable pit, and cut eight sections of HOn3 code 70 track from the roundhouse to the turntable.


With the tracks roughly in the correct position, I tried moving a locomotive in and out of the roundhouse. Almost immediately I detected a problem. The first set of walls that Mike Rebeiro made had the entry doors too small for engines to pass. The new walls left sufficient doorway clearance on both sides of the engine, but the roof of the cab scraped the curved arch of the doorway.
What was the problem? Photos of the prototype show that the rails and ties on the inside of the roundhouse are buried in gravel, so that the tops of the rails are level with the floor. In my model, the rails and ties sit ON the cork floor, making the rail heads 1/8 inch too high to clear the arch.

Not wanting to ask Rebeiro to make a third set of castings, I thought about ways to work around the 1/8 inch difference. I could, of course, raise the roundhouse 1/8 of an inch, which would have been a bear to do. Finally, I decided to capture the 1/8 inch difference by LOWERING THE TRACKS by that amount. Since I already had a 1/8 inch layer of cork on top of the foam, I could simply use a hobby knife to cut away the cork from around the tracks, using the floor templates as guides. The area from the roundhouse doors to the turntable would also be cut out, to be later filled in with ballast. Since the entire yard sits on the cork, that would require a height adjustment on the approach tracks, but I figured that was a minor inconvenience.

In the above photo, you can see where the cork has been cut away in two of the stalls, along with the cork around the tracks from the roundhouse to the turntable. The 1/8 inch difference allows the engines to clear the top and side of the door openings (The rectangles drawn on the cork represent the locomotive service pits.)
The code 70 rails are .070 inches in height, which is a tad more than 1/16 (0.0625) of an inch. The ties are a little less than 1/16 inch, so that the combined height of rails and ties is just about 1/8 inch, which is also the thickness of the cork. It occurred to me that I could use strips of 0.060 x 0.188 Evergreen styrene to sit on the ties on either side of the rails, making it appear that the floor extends up to the rail heads. A wider strip (0.060 x 0.250) over the center of the track would leave just enough room for wheel flanges to clear. In the following photo, you can see the side strips in place under the EBT's M-1 gas electric doodlebug. The floor, both cork and styrene strips, will be painted and covered with fine gray ballast to simulate the gravel floor in the prototype.

Here is an over head view of the roundhouse with all eight stalls cut out, but without the styrene strips installed. In my next post, I will detail how I constructed the roof to allow for easy removal and servicing. Future posts will focus on construction of the turntable and lighting the roundhouse using surface mounted LEDs and track power.

No comments:
Post a Comment